Notes for Developers
While the actual installation of XOOPS for development use is similar to the normal installation already described, there are key differences when building a developer ready system.
One big difference in a developer install is that instead of just focusing on the contents of the htdocs directory, a developer install keeps all of the files, and keeps them under source code control using git.
Another difference is that the xoops_data and xoops_lib directories can usually remain in place without renaming, as long as your development system is not directly accessible on the open internet (i.e. on a private network, such as behind a router.)
Most developers work on a localhost system, that has the source code, a web server stack, and any tools needed to work with the code and database.
You can find more information in the Tools of the Trade chapter.
Git and Virtual Hosts
Section titled “Git and Virtual Hosts”Most developers want to be able to stay up to date with current sources, and contribute changes back to the upstream XOOPS/XoopsCore27 repository on GitHub. This means that instead of downloading a release archive, you will want to fork a copy of XOOPS and use git to clone that repository to your dev box.
Since the repository has a specific structure, instead of copying files from the htdocs directory to your web server, it is better to point your web server to the htdocs folder inside your locally cloned repository. To acomplish this, we typically create a new Virtual Host, or vhost that points to our git controlled source code.
In a WAMP environment, the default localhost page has in the Tools section a link to Add a Virtual Host which leads here:
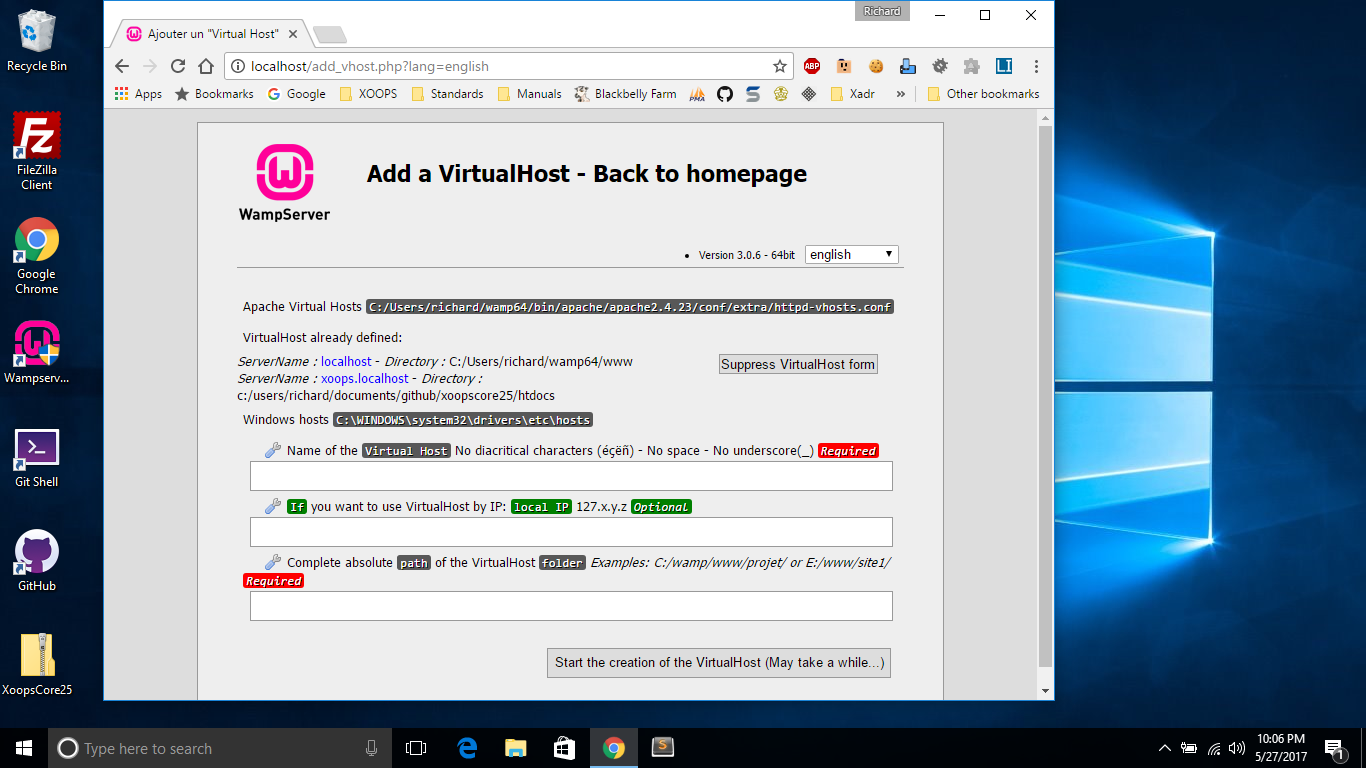
Using this you can set up a VirtualHost entry that will drop right into your (still) git controlled repository.
Here is an example entry in wamp64/bin/apache/apache2.x.xx/conf/extra/httpd-vhosts.conf
<VirtualHost *:80> ServerName xoops.localhost DocumentRoot "c:/users/username/documents/github/xoopscore27/htdocs" <Directory "c:/users/username/documents/github/xoopscore27/htdocs/"> Options +Indexes +Includes +FollowSymLinks +MultiViews AllowOverride All Require local </Directory></VirtualHost>You might also need to add an entry in Windows/System32/drivers/etc/hosts:
127.0.0.1 xoops.localhostNow, you can install on http://xoops.localhost/ for testing, while keeping your repository intact, and keeping the webserver inside the htdocs directory with a simple URL. Plus, you can update your local copy of XOOPS to the latest master at any time without having to reinstall or copy files. And, you can make enhancements and fixes to the code to contribute back to XOOPS through GitHub.
Composer Dependencies
Section titled “Composer Dependencies”XOOPS 2.7.0 uses Composer to manage its PHP dependencies. The dependency tree lives in htdocs/xoops_lib/ inside the source repository:
composer.dist.jsonis the master list of dependencies shipped with the release.composer.jsonis the local copy, which you can customize for your development environment if needed.composer.lockpins exact versions so installs are reproducible.vendor/contains the installed libraries (Smarty 4, PHPMailer, HTMLPurifier, firebase/php-jwt, monolog, symfony/var-dumper, xoops/xmf, xoops/regdom, and others).
For a fresh git clone of XOOPS 2.7.0, starting from the repo root, run:
cd htdocs/xoops_libcomposer installNote that there is no composer.json at the repo root — the project lives under htdocs/xoops_lib/, so you must cd into that directory before running Composer.
Release tarballs ship with vendor/ pre-populated, but git clones may not. Keep vendor/ intact on development installs — XOOPS will load its dependencies from there at runtime.
The XMF (XOOPS Module Framework) library ships as a Composer dependency in 2.7.0, so you can use Xmf\Request, Xmf\Database\TableLoad, and related classes in your module code without any additional installation.
DebugBar Module
Section titled “DebugBar Module”XOOPS 2.7.0 ships a DebugBar module based on Symfony VarDumper. It adds a debug toolbar to rendered pages that exposes request, database, and template information. Install it from the Modules admin area on development and staging sites. Do not leave it installed on a public-facing production site unless you know you want to.